[The information in this article has under no circumstances been created for – or is intended to be used for – illegal purposes. Growing/cultivating cannabis is illegal in many U.S. states. We, therefore, advise that all readers become familiar with current laws and regulations in their region before they learn how to grow cannabis indoors].
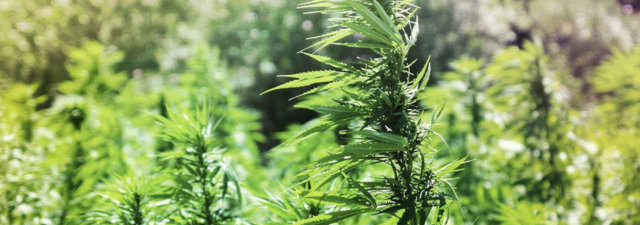
As a potential first-timer learning how to grow cannabis indoors, getting started is the biggest roadblock you’ll likely face. First, you have to find the right place to cultivate and obtain the proper growing equipment. Then, you need to buy cannabis seeds and spend a lot of time checking and maintaining your crop.
It isn’t easy, but it’s not quite as daunting as you might think. Yes, there’s a lot of work, but when you follow the advice in this guide, the marijuana growing process becomes a whole lot easier. Below, I discuss all the most salient aspects of cannabis cultivation. This includes the legality, the different factors to take into account, and an overview of the plant’s life cycle.
For most people, indoor growing is their only realistic option, which is why I’ve created this guide. If you somehow have the ability to grow cannabis outdoors, click the link for information specific to outdoor cultivation.
First Things First: Is It Legal to Grow Marijuana Indoors?
Before you do anything else, make sure it’s legal to cultivate marijuana where you live! Unfortunately, marijuana remains federally illegal. This has been the case since the Marihuana Tax Act of 1937, which was followed by the Controlled Substances Act of 1970.
However, a number of states that have legalized the use of medicinal or recreational marijuana permit residents to cultivate the plant at home. Yet, the rules vary from one jurisdiction to the next, as you’ll discover by reading our state-by-state guide to growing marijuana.
Please note that you can’t necessarily cultivate marijuana in every state that allows recreational use. For example, it remains illegal to grow at home in Delaware, New Jersey, and Washington State. The penalties for breaking the law can range from a fine to serious prison time depending on where you live.
It’s also crucial to remain within your state’s growing limits. In many states, you can grow up to six marijuana plants per adult, but in some cases, only three of the plants can be mature.
Once you’ve determined that cultivating marijuana in your state is legal, you’re ready to get started.
How to Grow Cannabis Indoors: Key Considerations
The “fail to prepare, prepare to fail” mantra applies to many things in life, and cannabis growing is certainly one of them. Experienced growers understand the value of preparation and know precisely what’s needed before they ever put a seed in the soil.
While novices shouldn’t expect to know the minutiae of marijuana growing, there is a long list of things you have to consider before you begin. I have outlined many of the most important below.
Growing Space
First things first, you need to decide where to place your indoor grow room. The good news is that you don’t need a particularly large growing/cultivating space. A typical grow room for a small-scale grower is a small tent, cabinet, or designated area in a spare room; even an unused corner of the house is sufficient!

If you’re a novice, it’s perhaps best to start with just one or two plants. There’s an inevitable learning curve involved with growing weed indoors and you’re bound to make some mistakes.
It shouldn’t take long to get the hang of things and start producing some beautiful, flowering cannabis plants, but you’ll need to make room as your plants grow. From the first signs of flowering, you can expect a plant to double or even triple in size by harvest time.
Overall, make sure you have enough space to work in. As you’ll inevitably want to check in on your plants regularly, please ensure it’s easy to get in and out of the growing space.
Now’s a good time to analyze the overall cost of setting up a marijuana grow room. It doesn’t need to cost a small fortune but an initial investment of a few hundred dollars is mandatory if you’re serious about cultivating marijuana in the long term. Experienced growers spend thousands of dollars but save a small fortune in the end.
I should point out that some people create a marijuana grow tent for a few dollars. Whether you’ll get the desired yield is another story, of course!

Container Size
It’s very important to grow your cannabis plants to a size suitable to your space and likewise to the container you choose. You will need to transplant every time your plants double to triple their size. Small cups or 4-6” pots are good for starters.
Think about how big you ultimately want to grow your plants when deciding on pot size for their final home. I suggest one gallon of soil for every foot tall you intend to grow them (so four gallons for a four-foot plant). Regardless, plants don’t like waterlogged conditions, so perforate the bottom of the bucket so the water can drain as needed.

There are some outstanding pre-filled soil kits specially designed for increased airflow. Keep these in mind when deciding what to grow your first cannabis plants in.
Water
A common assumption amongst rookie plant growers is that the more you water, the better. While this is true to an extent, there is such a thing as “too much water.” Overwatering your indoor cannabis plants can prove detrimental to their productivity and potentially stunt or kill them!
A few obvious things determine the frequency of watering your marijuana plants and the amount you give. These include the size of the plant, the stage of development, and the rate of photosynthesis (how fast it’s growing). However, there’s no exact science when deciding how much water to give and how often.
Make sure holes are drilled into your growing container so the water can drain out. When watering, try to only moisten the soil rather than saturate it. This allows you to fully saturate the pot without overwatering. Try not to water them until they’re almost dry. This is called cycling.
Lastly, consider using an RO filter, as excess levels of chlorine and unfiltered minerals could harm the plants. You may want to choose a distilled option or at least filter it before adding it to your soil. Mineral-laden tap water can cause unwanted build-up in the cannabis root systems, which can lead to detrimental root disease.

Soil
When cultivating cannabis indoors, there are two viable options: Growing in traditional soil or a hydroponic tray. Soil is typically recommended if you’re growing indoors for the first time. It’s cheaper, more straightforward, and more forgiving than an advanced hydroponic system. Let’s take a closer look at each of the two options.
Soil vs. Soilless Growing
Soil is less expensive, easier, and offers a higher margin of error. However, you need to carefully select the soil you use because quality can vary enormously.
General potting soil doesn’t work very well. You want a high-grade horticultural potting mix, which is light and airy. Some mixes come “charged” with a small amount of nutrients to get you through the first few weeks. However, these will need regular fertilizing later.
Other mixes are “neutral,” without any nutrients present. These mixes need appropriate amounts of fertilizer right from the start. Amendments to soil ingredients include compost teas and mycorrhizae bacteria, as well as other organic compost nutrients.
Another idea is “all-in-one” automated hydroponic setups, which may help you experience faster growth and more abundant yields. This is only the case if everything is done correctly – all the time, every time (unlike soil, which has natural buffers to give you some wiggle room).
A hydroponic system delivers all necessary mineral salt nutrients to plants in water. If you want to choose hydroponics over traditional soil, there are several straightforward and fairly easy-to-understand types. These include ebb-and-flow, flood-and-drain, and DWC or Deep-Water Culture.

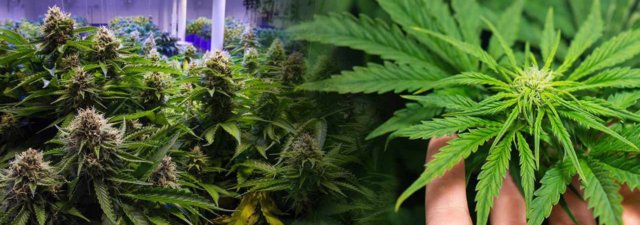
Nutrients
Ensuring your plants get the right nutrients is probably second only to lighting in terms of importance. Proper nutrient selection and application are among the most critical factors in growing premium-grade cannabis. While weed is resilient, growing it in sub-optimal conditions means you will miss out on yield and potency.
Whether you’re using an organic soil mix or growing hydroponically, your cannabis plants need the “super seven” macronutrients. In no particular order, these are:
- Nitrogen (N)
- Phosphorous (P)
- Potassium (K)
- Calcium (Ca
- Magnesium (Mg)
- Iron (Fe)
- Copper (Cu)
You can get these macronutrients pre-packaged in liquid or powder form (if you’re using an un-supplemented soil mix). However, a lot of organic “super soils” already contain them in sufficient amounts.
Lastly, some strains require more calcium than others to produce robust, healthy nugs. Perform a little research on the particular strain you are growing. This process enables you to become more familiar with the kind of “food” it needs and prefers the most.

Light
Light is essential for the growing process. Your plants receive direct light the majority of the time. Be direct here: e.g. plants need 12 hours of continuous, uninterrupted darkness to flower and eventually produce buds.
Like most living things, cannabis plants need their “rest time.” If light from a surrounding source is seeping in during dark hours, the (bud-producing) females could get confused and develop hermaphroditic characteristics.
A hermaphrodite cannabis plant will produce flower that’s full of seeds (instead of sinsemilla weed), ruining your chances of a decent yield of smokable buds.
The light source you use in your grow room plays a significant role in determining the quality of the plants. I recommend spending a large portion of your budget on a good lighting setup. It is worth it in the end, particularly if you plan on growing long term.
Here’s a basic rundown of the most popular types of cannabis grow lights used today.

LED Grow Lights
If cost isn’t a consideration, LED (light-emitting diode) lighting is the preferred option for most marijuana growers. These are highly efficient light fixtures for indoor growing. They use less energy and create very little heat. LEDs produce wavelengths across the light spectrum, so they can be used for both the vegetative and flowering cycles.
The drawback is they can cost 3-5 times more than a decent HID setup! If you’re serious about getting into growing and have money to spend, however, give serious consideration to LEDs. But do your homework to avoid ‘scam’ LEDs online.
Induction Grow Lights
Induction lamps are an odd choice for indoor growers. However, some companies have recently adapted them for the cannabis industry. They can potentially represent decent value in terms of cost and efficiency.

Nikola Tesla invented the process of generating heat from magnetic induction in the 19th century. These types of lamps produce bright light with little heat compared to HID setups.
HID Grow Lights
The most commonly used lights for DIY-style growing are probably HID (high-intensity discharge) grow lights. They typically represent the best overall value in terms of cost, efficiency, and ease-of-operation.
The main drawback is that they require numerous accessories to run correctly. As a consequence, the overall cost can ramp up pretty quickly, depending on how much you’re willing to splurge.
For example, most growers use one of two main types of HID lamps/bulbs depending on the developmental stage. Metal halide (MH) bulbs are best during vegetative growth.
High-Pressure Sodium (HPS) is the preferred option for the mature flowering stage. If you can only afford one, choose HPS as they are much better for flowering and are more efficient on a ‘watt-to-light’ scale.
HID lights produce a substantial amount of heat. Therefore, proper use of air circulation and conditioning becomes vital. Some growers choose air-cooled fixtures to mechanically remove heat.
Fluorescent Grow Lights
Fluorescent lights are generally much cheaper and easier to use than the other options. They represent an excellent option for propagation of young plants or those with extremely low yield expectation. And remember: watts = grams.
Low wattage will not prevent you from growing potent little flowers. They also don’t require a connection to an external ventilation system. Fluorescent lights are far less powerful than the other options. However, for novice DIY growers with a single plant or two and little space, they might be your best bet.
Airflow
Make sure you have consistent airflow across your entire plot. Depending on the size of your grow room, you can achieve this easily. Utilize several types of fans, including oscillating wall mount, stand fans, and box fans. Place them strategically to create good air flow throughout the space.

Since warmer air rises, mount your exhaust fan(s) high so they can suck out hot, stagnant air. On the flip side, your intake fan should be mounted low so it can provide a good supply of cool, CO2-filled fresh air. This technique allows for a constant supply of fresh air for your plants. It also helps keep temperatures to a manageable level.
Temperature/Humidity/pH
Speaking of temperatures, most cannabis strains prefer an upper range between 75- and 85-degrees Fahrenheit. When the lights are off, keep the room temperature between 55 and 75 degrees. Indica strains tend to prefer the cooler end of the range.
The next step is a self-monitoring system to control it all. We assume you can’t spend 24 hours a day in your grow space! You need a 24-hour timer and an adjustable thermostat. The latter allows you to set your exhaust fan to switch on once temperatures go above a certain degree.
The result is a relatively stable temperature range and humidity level while saving energy and money. For reference, you want the relative humidity (RH) to be between 50% and 60% during the vegetative state. In the flowering state, cut RH to between 40% and 50%, reducing it to the lower end of this range near harvest time.
The 24-hour timer is just as important. When the marijuana plants are in vegetative growth, you need the light supply on for around 16-24 hours per day. Once they mature and reach the flowering stage, your plants need 12 hours light and 12 hours dark.
I also recommend investing in a pH meter to check on the quality of your water and soil regularly. If you’re growing in soil, try to keep the pH between 6 and 7, with the sweet spot being 6.2-6.5. If you’re growing hydroponically, 5.5 to 6.5 is an appropriate range with the sweet spot of 5.8-6.0.
Pest Control
Make sure your cultivating space is sanitized and clean. Pests and contaminants pose an inherent risk. A messy space invites pathogens, harmful bacteria, and mold. A good idea is to plan a bi-weekly cleaning routine and stick to it. Pests to be concerned about include whiteflies, red spider mites, and aphids. They can do serious damage if left unchecked.
Also, remember that marijuana plants are “bio accumulators,” which means they “suck up” everything around them (both in the air and the soil). Make sure the area surrounding the plants is clean enough to keep potential contaminants out.
Odor Control
I’m assuming that it’s legal to grow marijuana where you live and are remaining within the maximum cultivation limits! In that case, you don’t need to worry about law enforcement getting involved.
However, you may still value discretion and want to avoid your neighbors and passers-by knowing about your hobby. Remember, even in certain states where recreational cannabis is legal, employers can fire you for testing positive for THC metabolites in a drug screening. Such tests can uncover marijuana use from days or even weeks ago.
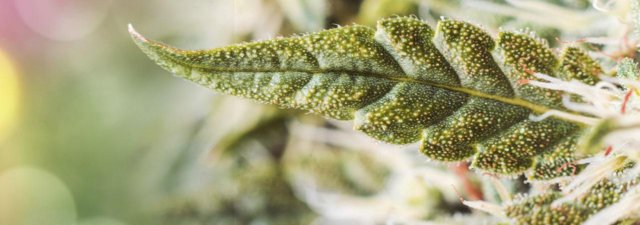
Therefore, you need to control the smell of marijuana in your grow room. It mainly becomes a concern during the flowering period when the plant develops trichomes which in turn produce terpenes. This is when the smell of marijuana can become more obvious.
Here are some tips for reducing weed odor:
- Ensure proper airflow in the grow room; it’s worth investing in high-quality oscillating fans
- Keep temperature and humidity in check; the smell of weed becomes more apparent in hot, humid conditions
- Consider buying odor absorbing gels for the last few weeks of the growing cycle
- Activated carbon filters can also help reduce the telltale scent of cannabis
As an aside, I also recommend buying a strong lock for your grow room. If someone finds out that you’re growing weed, your property could become a target for burglars. Upgrade your home security system too if you’re concerned about safety.
Putting It All Together – What Does Growing Cannabis Indoors Look Like?
Now that you have a strong idea of what cultivating cannabis indoors entails, let’s quickly breeze through the process. You should check out our guide on the stages of the cannabis plant growth cycle for a more comprehensive overview.
It’s clear that DIY indoor growers are unable to perform a 24/7 watch over their plants. However, you can provide adequate care by setting aside a few minutes a day. Routine checks, such as ensuring things like temperature, humidity, pH, and water levels are correct, are essential. Over time, you’ll get used to the process, and may even enjoy it.
Choose Your Seeds
Genetics matter when it comes to marijuana. There can be a huge variation in yield, smell, appearance, disease resistance, and much more from one strain to the next. It’s worth conducting some research to ensure that you don’t accidentally pick a challenging cannabis strain to grow when you’re a novice.
For reference, the easiest strains to cultivate indoors include Blackberry and Blue Cheese. In the end, it’s important to learn about the strain you’re choosing before buying the seeds. That way, there won’t be any unpleasant surprises.
Speaking of which, make sure you choose feminized seeds if you want to avoid having male plants in your garden. If you wish to grow high-THC buds, the only thing you want in your crop is female plants.
If you have a male in your crop, REMOVE IT. Once it reaches maturity and its pollen sacs burst, it fertilizes the females. At this point, they’ll start developing seeds rather than growing buds. While the plants won’t die, their ability to yield buds is ruined.

If you’re growing from seed, you need to wait until the flowering stage to tell the difference between male and female marijuana plants. After a week of nighttime photoperiod, the plants will start reaching maturity and will develop reproductive parts at the nodes.
This is when you can extract the male plants and eliminate them. Male plants will have what look like little clusters of bananas; these are the pollen sacs. Female plants will have sharper early-stage calyxes with white hairs (pistils). Those growing from female clones or pre-purchased feminized seeds should have no concerns about male plants.
From Germination to the Vegetative Stage
There are many different seed germination methods, but the paper towel method is the easiest. In general, it can take anywhere from one to seven days for your seeds to spout when using the paper towel tactic.
The next step involves transferring the seeds to your chosen growing medium once you see their taproots. This is a delicate process, and you must avoid touching the taproot. You can use a small, 2-inch pot of soil for each seed at the beginning.
Now, you get the excitement of watching the seedling grow! You should see a couple of leaves that open outward from the stem. Next, come those legendary cannabis leaves at the top of the plant. Typically, a marijuana plant will remain a “seedling” for up to three weeks, although it can take longer. Keep the grow room temperature to the mid to high 70s Fahrenheit with an RH of around 60%.
Vegging & Flowering
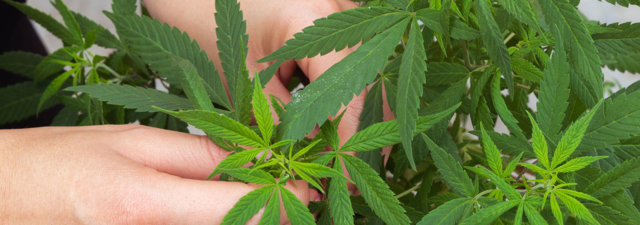
It’s necessary to move your plants to bigger pots once the vegetative stage begins in earnest. Within a couple of weeks, your plants will take shape and get taller. It is also at this point that differences between indica and sativa strains will become noticeable. Indicas remain short and bushy, whereas sativas become tall and relatively thin.
Keep the temperature in the high 60s to mid-to-high 70s, with the RH at 50% at this point. If your plants become excessively bushy, you might want to attempt marijuana plant training at this point. Through this process, you remove unnecessary foliage, ensuring that the plants use nutrients more efficiently.
When your plants are ready, it’s time to switch the lighting to a 12-12 cycle. This means giving them 12 hours of consecutive light, followed by 12 hours of darkness. By doing so, you force your plants into flowering. This is when the coveted sticky resin, trichomes, and terpenes form.
You can keep the temperature in the late 60s to mid-70s with the grow room’s RH set at below 50%.
Harvesting
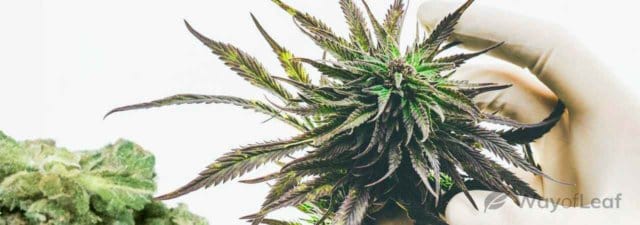
Now for the exciting part: getting ready to enjoy the fruits of your labor. Determining the right time to harvest cannabis plants isn’t easy. The flowering period varies depending on the strain, and if you get your timing wrong, you could negatively impact the yield and potency of your crop.
One trick experienced growers use is analyzing the pistils. If around three-quarters of them have turned brown (or reddish brown), it’s probably a good time to begin the harvesting process. That being said, it’s better to be too quick on the draw than wait too long.

Pruning, Drying & Curing
You’re almost at the finishing line! With your plants successfully harvested, it’s time to begin the pruning process. Training your plants during the growing cycle (preferably in the vegetative stage) reduces the need to trim your crop after harvest. If necessary, remove fan leaves from the buds. You can do the same with the sugar leaves, although these contain cannabinoids and could prove useful when making cannabutter.
The final step involves drying and curing your cannabis buds. Drying is necessary to avoid mold growth and you can complete the process using mason jars, a drying rack, a hygrometer, and humidipacks.
A lot of people avoid the curing process as it’s time-consuming. However, real connoisseurs value it because, when it’s performed correctly, it greatly increases the flavor and potency of the final product.

How to Grow Cannabis Indoors: Gain New Appreciation for This Marvelous Plant
The entire process of cultivating marijuana indoors varies depending on various factors, including the strain you choose. However, it will take several months to guide a seed to full maturity. At that point, you have to decide whether you want to spend more time curing your plants for higher potency and better taste.
When looking to grow weed indoors, you must consider the laws of your state, your budget, space, privacy, security, time, and many other factors. Yet, if you have a successful harvest, you’ll undoubtedly experience a feeling of great accomplishment and a greater understanding of marijuana.
For many growers, it’s not about the size of the yield. It’s more of a passion project, and for those who cultivate marijuana at home, the rewards go far beyond what they include in a joint.
In a nutshell, growing marijuana at home is a fabulous endeavor. There’s no doubt a bit of a learning curve involved. You’ll make your fair share of mistakes. However, trust me when I say it’s all worth it in the end.
Enjoy, and more than anything else, remember to HAVE FUN!
![Why Are My Cannabis Leaves Turning Yellow? [Explained]](https://marijuanabreak.com/wp-content/uploads/2020/08/wol-banner-why-are-my-cannabis-leaves-turning-yellow-640x225.jpg)

![8 Tips for Growing G13 Marijuana [Grower’s Guide]](https://marijuanabreak.com/wp-content/uploads/2019/01/mj_growing-g13-marijuana-640x225.jpg)

![Drying and Curing Cannabis Buds [The Easy Guide]](https://marijuanabreak.com/wp-content/uploads/2018/07/drying-and-curing-cannabis-buds-1-640x225.jpg)
